
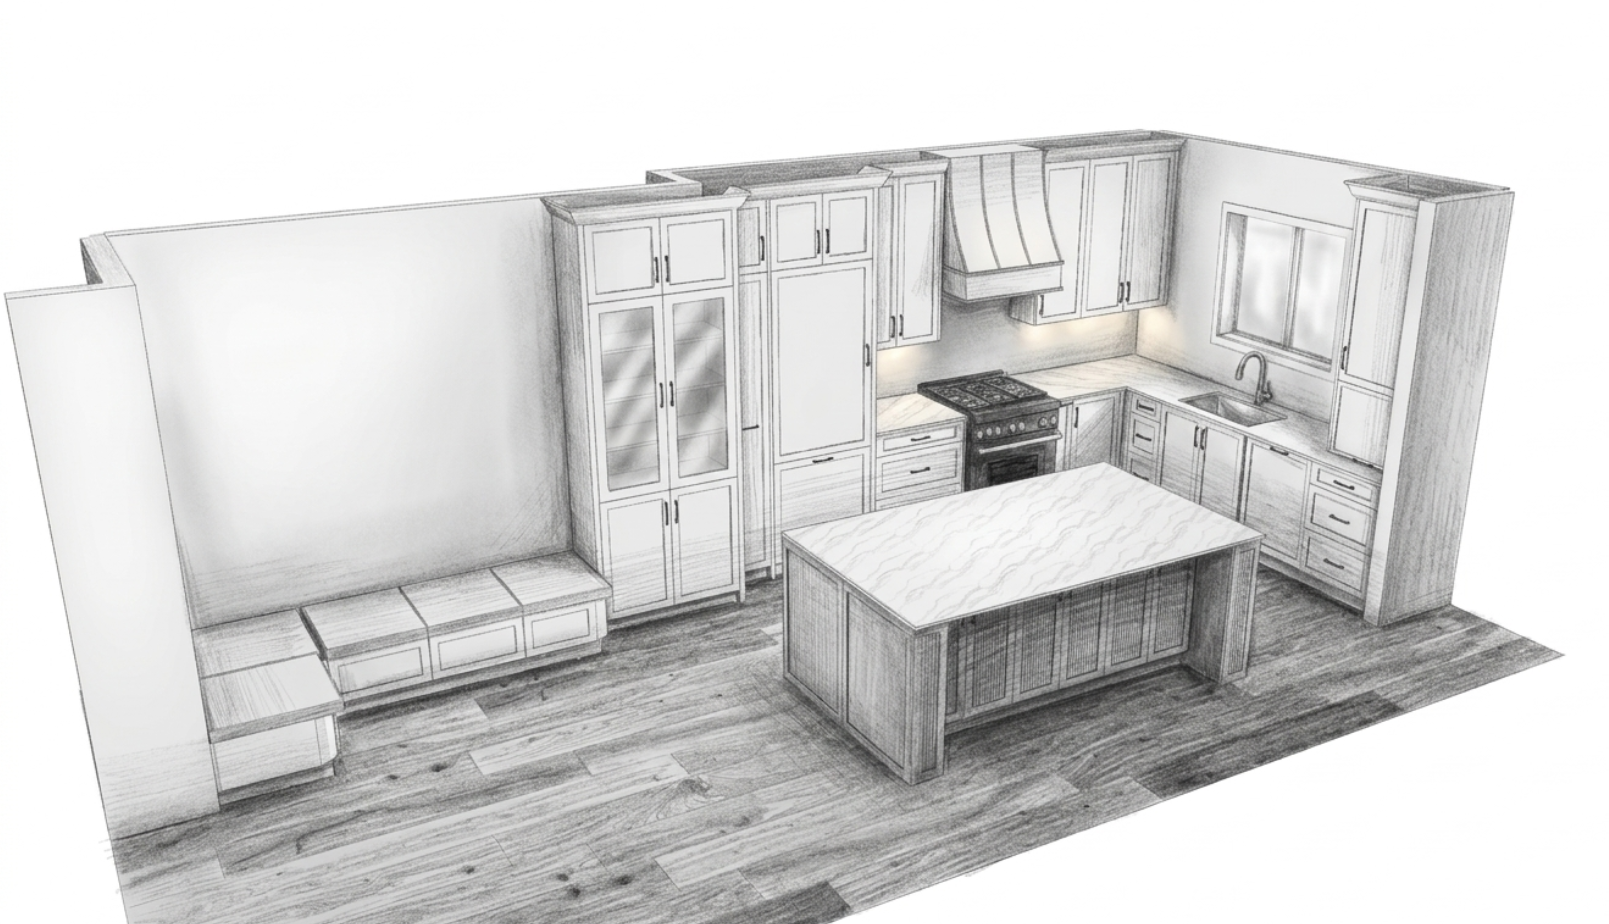
The cheapest place to move a cabinet is on screen. Once it is cut, every change costs time on the shop floor.
This guide is for homeowners planning a new kitchen, bathroom or closet. It walks through custom cabinetry design room by room: what to decide, what to measure and what to have ready, so the cabinet shop that builds your project starts from a design that already fits how you live.
By the end you will know what a finished design should include, the questions each room raises, and how a design turns into something a shop can build.
In this guide:
- Why cabinetry design comes first
- Kitchen design
- Bathroom design
- Closet design
- What to have ready
- From 3D rendering to the shop floor
Why cabinetry design comes before the cabinet shop
Most cabinet shops can build almost anything. What they cannot do is guess how you cook, what you store or which wall the plumbing is on. A design answers those questions before anyone orders material, while changes are still quick and free.
What a finished design gives you
- A layout: where every cabinet, appliance and fixture sits in the room.
- Elevations: each wall drawn flat, showing doors, drawers, heights and fillers.
- 3D renderings: the room as you will see it, so you can judge proportions and finishes before you commit.
At Atlantis Designs we draw this work in Mozaik, cabinet design and manufacturing software that many cabinet shops use to produce their work. The same Mozaik job that produces the renderings also produces shop drawings and cut lists, so what you approve and what gets built come from one design.
Millwork design vs interior design
Interior design usually covers the whole look of a room: colour, furniture, lighting, finishes and decor. Millwork design is narrower and more technical. It decides what actually gets built in wood, from every cabinet box, door and drawer to panels and shelves, and how all of it fits the walls, plumbing and appliances.
The two work well together. An interior designer can set the direction, and a millwork design turns that direction into cabinetry a shop can make.
Kitchen design: plan around how you cook and store
Good kitchen design starts with how the room is used, not with door styles. The cabinetry follows from a few practical answers.
Layout and workflow
Note where you prep, cook and clean up, how many people work in the kitchen at once, and where people walk through it. Those answers decide where the sink, cooktop and refrigerator go.
- Who cooks, and how often?
- Do you want seating at an island or peninsula?
- Where do people pass through while someone is cooking?
- Which views, windows or walls should stay open?
Storage: drawers, pull-outs and tall units
Write down what needs a home: pots and pans, small appliances, pantry food, dishes, cleaning supplies, recycling. Then decide how each group should be reached. Deep drawers in base cabinets let you see and lift out what is at the back, pull-outs use narrow spaces, and tall pantry units hold a lot in a small footprint. A good design gives each group a specific place.
Appliances, lighting and the details people forget
- Appliance specifications: collect model numbers and installation guides before the design is final. Cabinet openings depend on them.
- Panel-ready appliances: decide early if the dishwasher or refrigerator should be hidden behind cabinet panels.
- Lighting and outlets: plan under-cabinet lighting and outlet locations with the cabinetry, not after it.
- Clearances: doors and drawers need room to open past handles, walls and appliance doors. Fillers and panels solve this, but only if they are planned.
- Ceiling height: tall uppers, crown moulding or bulkheads all depend on the real ceiling height, measured in more than one spot.
Bathroom design: a vanity sized to the room
In a bathroom, the vanity is usually the main piece of cabinetry. Good bathroom vanity design comes down to a few centimetres that decide whether the room feels comfortable or cramped.
Width, depth and height
Vanity sizes vary, but planning guides publish similar starting points:
| Dimension | Common starting range | Worth knowing |
|---|---|---|
| Width | About 24 to 48 in (61 to 122 cm) for one sink; 60 to 72 in (152 to 183 cm) for two | Two sinks need enough space between them to use both at once |
| Depth | About 20 to 22 in (51 to 56 cm); 14 to 18 in (36 to 46 cm) for small rooms | The countertop usually overhangs the cabinet front |
| Height | About 30 to 34 in (76 to 86 cm) | Taller vanities suit many adults; vessel sinks add height |
Sources: Aquatica vanity dimensions guide and Home Depot: how to measure for a vanity.
Clearances, plumbing and the door swing
- Measure from the vanity location to the toilet, the tub or shower, and the path of the bathroom door.
- Locate the drain and water supply lines. Drawers and shelves inside the vanity must work around them.
- Plan the mirror or medicine cabinet and the lighting at the same time as the vanity.
- Decide what the vanity needs to store: towels, toiletries, cleaning supplies, a hair dryer.
- Clearances around toilets and fixtures are set by building codes. In BC, confirm them with your contractor or local building department.
Closet design: zones, depths and clearance
Closet design is mostly about fitting what you own into the space you have, and leaving enough room to move.
Measure walls, ceiling and obstructions
Measure each wall and the ceiling height, and note everything that interrupts them: windows, doors and how they swing, light switches, vents, attic hatches and sloped ceilings. Closet planning guides such as Closet Factory’s measuring sheet start the same way.
Hanging, shelving and drawer zones
Sort what you own into groups: long hanging items (coats, dresses), short hanging items (shirts, folded trousers), folded items for shelves, items for drawers, shoes and accessories. Each group becomes a zone in the design.
| Zone | Typical depth in planning guides |
|---|---|
| Shelves and cubbies | About 12 to 15 in (30 to 38 cm) |
| Drawers | About 14 to 18 in (36 to 46 cm) |
In a walk-in closet, keep clear floor space to move and to open drawers, and leave some room for the things you will own next year.
What to have ready before your first design conversation
You do not need everything on this list to start a custom cabinetry design, but each item brings the first draft closer to right:
- Measurements or plans: each wall, the ceiling height, windows and doors, and where plumbing, electrical and vents are. Architectural plans help if you have them.
- Photos: the room from each corner.
- Model numbers: appliances, sinks, faucets and any fixtures that stay.
- A storage list: what the room needs to hold.
- Pictures you like: and anything you know you do not want.
- Your timeline: and the shop that will build it, if you already have one.
Our contact page lists what to include in a first message, and the FAQ answers common questions about working with us.
From 3D rendering to the shop floor
This is where custom cabinetry design pays off. Once you approve the design, it has to become something a shop can build. Because the design is drawn in Mozaik, the same job produces the shop drawings, cut lists and hardware lists alongside the renderings. The parts match the drawings, and the drawings match what you approved.
If you run a cabinet or millwork shop, this is the design work we take on for you: see design services for millwork shops. Learning Mozaik yourself? Start with our Mozaik and AutoCAD tutorials.
Common questions
What will I receive from a custom cabinetry design?
A layout, elevations of each wall and 3D renderings of the room, refined with you until the design is right. See kitchen, bathroom and closet design for how it works.
Does Atlantis Designs build or install the cabinets?
No. Atlantis Designs provides design services. Your finished design is built by a cabinet or millwork shop.
What if I do not have exact measurements yet?
Start with what you have: a floor plan, photos and rough measurements are enough to begin the conversation. Final drawings need accurate measurements of the room.
Plan the room before it is built
Tell us about your kitchen, bathroom or closet. We will reply by email or phone.